Thursday, October 29, 2009

Cake Pop Tutorial

I have yet to meet a person that doesn't love cake pops. The idea came from one of my fav baking divas Bakerella, but I was introduced to them last year by my friends over at cafe mom. The creative possibilities with these little treats are endless as are the flavor combinations. Check out some variations here. Are they not the cutest things ever? Since I am not the creator of cake pops, I will direct you to Bakerella's original cake pop post as well as this great you tube vid that one of the ladies from cafe mom made for refrence. But here's my process.

Crumble cake into a food processor. It is possible to break it up with a cake if tou don't have a food processor, but it must be completely crumbled.


It should look like this once you're finished.


Next, add your icing. Start with a small amount, because if the mixture gets too moist, your cake pops will not stay on their sticks later. If you are using prepared frosting, be sure to get whipped. I usually use homemade frosting for my cake pops, but I needed it all for the cake, so I used the next best thing. Betty Crocker!


Mix until the frosting is fully incorporated and the mixture just comes together.


Line a cookie sheet with parchment and roll mixture into 1- 1 1/2 in. balls. Be careful not to make them too big.


I added sprinkles to half of mine for textire. Just sprinkle them right in.


Place your cake balls into the freezer for about 15 min to firm them up. Once you remove them from the freezer, it's time to place the lillipop sticks. Dip the end of the stick into your chocolate/candy and insert into your cake balls. This helps to anchor the sticks.


Now the fun begins. Dip your cake pops into your candy/chocolate and decorate. If you want to add sprinkles, do it immediately. To add designs or multiple colors, let cool for a few minutes before decorating.


Place in a styrofoam block to dry.


Enjoy! They are really good frozen too. They will last for up to a week in the fridge, but I guarantee you they won't be around that long.

Kaylee's First Birthday Rainbow Cake and Cake Pops


Miss KK turned 1 yesterday. It's hard to believe that it's been a year already. To celebrate the occasion, I decided I would make her a Rainbow Cake. The cake was really fun to make, time consuming but fun. I used Betty Crocker Boxed White Cake and Homemade Cream Cheese Icing. Since this was to be her smash cake, I used a 6 in round cake pan and for the top layer I a 1cup ceramic bowl that was the perfect size for a cute little topper.


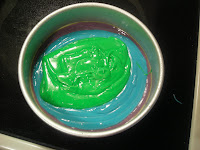
I dyed the batter using both Wilton Gel colors and some Liquid Food color. I didn't do my research beforehand and bought liquid dye to use for this cake, but when I realized the difference in the vibrancy of the colors, I used the few Wilton gel colors I had on hand. Gel color gives the batter a much more vibrant color than the liquid (notice the difference between the green vs the red). The liquid color will produce a more pastel looking rainbow which is not what I wanted.
I layered the first 3 colors in the 6 in pan.
All 6 colors in the pan. It's so pretty. I was really proud of myself at this point.

Okay, here's where mistake #1 happened. Can you spot it? As I mentioned before, I am really an inexperienced baker. That coupled with the fact that I haven't made a cake in a while contributed to me forgetting that I needed to allow space in the pan for the cakes to rise. So needless to say, I had a slight catastrophe. As I look at this photo, I can't help but think WTH was I thinking filling the pans that much.
All baked! See how pretty. Unfortunatlaely, all of my purple boiled over out of the top layer, that's it sitting in the background. And I also lost quite a bit of cake from the bottom layer, but I'm actually excited about it because I know just what to do with the extra cake. But first lets ohh and ahh over the pretty cake.
The top layer. Can you see that one speck of indigo in the very center? LOL What a trooper.

6 in bottom layer. I was concerned with how dark the red would turn out, and thankfully it's not at all dull. You also can't see much indigo in this layer either. Oh well.
And here it is all fancied up. I know my decorating needs major help, but hey I'm new to this.

And remember the leftover scraps? Well I turned them into this!
Rainbow cake pops! I wrote Happy 1st B-Day Kaylee on 4 of them and stuck them into the sides of cake since there really wasn't much room on the actual cake for writing. Here's the finished product.
The Birthday girl enjoyed her cake.


Wednesday, October 28, 2009

Linguini with White Clam Sauce

I used a combo of two recipes, but the basis was Rachel Ray's version the only thing I did differently was to add 2 T Roasted red peppers and used dried Italian seasoning, because I didn't have any thyme. Unfortunately, I didn't get pics of the finished product, but I do have a pic from the site. My changes and notes are in red.


Ingredients

  • 1/4 cup extra-virgin olive oil
  • 1 teaspoon red pepper flakes
  • 4 to 6 cloves garlic, finely chopped
  • 1 tin flat fillet of anchovies, drained, 6 or 7 fillets Don't omit this. The anchovies actually melt into the oil during cooking and they add a really good richness to the sauce
  • 2 tablespoons fresh thyme leaves, 4 or 5 sprigs stripped or 1 1/2 teaspoons dried I didn't have thyme so I subbed Italian seasoning
  • 1 cup dry white wine
  • 1 cup clam juice or chicken stock Chicken stock will add a buttery richness to the sauce and the clam juice will give a stronger clam flavor. I suggest using clam juice and adding a little chicken bouillon to the stock.
  • 1 can (15 ounces) fancy whole baby clams I used two 10 oz cans with juice.
  • 1 lemon, zested
  • 1 pound linguini, slightly undercooked, about 6 to 7 minutes
  • 1/4 cup chopped parsley leaves
  • Lots of black pepper and some coarse salt
  • Crusty bread, for mopping
  • 2 T chopped Roasted red bell peppers
  • 1/2 cup grated parmigiana cheese

Directions

Heat a large deep skillet over medium heat. Add extra-virgin olive oil, 4 turns of the pan in a slow stream, red pepper flakes, garlic and anchovies and cook until anchovies melt into the oil. Add thyme, roasted red peppers and wine. Reduce wine 1 minute. Add clam juice or stock. At this point, taste your sauce and adjust your seasonings accordingly. This is pretty much what your finished product is going to taste like, so If the flavor of the wine is too strong, reduce it a little longer, if you think it needs more garlic or salt, add it. This is where I got the idea to add the chicken bouillon along with a little more butter. I also reduced it a little longer than the original recipe suggested. Stir in clams and lemon zest. Drain pasta. (Add the pasta a little at a time because depending on how much sauce you have, you may not need the entire 1lb) Add to skillet and toss with sauce 2 to 3 minutes, until pasta is al dente and has absorbed some of the sauce and flavor. Add parsley, pepper and salt, to your taste and serve with bread for mopping up remaining juices.

Friday, October 16, 2009

Herb Meatloaf Stuffed with Prosciutto and Smoked Provolone


This is one of my family's favorite recipes, although I don't make it as often as I used to. It can be quite pricey to make, but the end result is worth it. I have played around with it a few times and found a couple of wallet friendly alternatives that can serve as substitutions. Instead of prosciutto, try thinly sliced ham and the smoked provolone could be subbed with a less pricey mozzarella (this is shown in the photo). Be creative and play around with the stuffing. I saw a recipe recently for a meatloaf stuffed with goat cheese and herbs. Okay, enough blabbing, on to the recipe.

Herb Stuffed Meatloaf

1 lb Ground Pork
1 lb Ground Chicken
1/4 cup finely chopped red onion
1/4 cup finely chopped roasted red peppers
2 eggs scrambled
1/2 cup grated Parmesan Cheese
2T fresh Italian Parsley
1/2 T fresh Basil
1/2 T fresh Oregano
1T Dried Italian Seasoning
1/4 lb thinly sliced Smoked Provolone Cheese
1/4 lb thinly sliced Prosciutto
Ketchup for top (optional)
Salt and Pepper

Preheat oven to 350. In a large bowl, mix together the meats, herbs, seasonings until thoroughly combined. Next, make a well in the center and add eggs, onion, and roasted red peppers, and Parmesan. Mix until combined (If your mixture seems too loose you can add more Parmesan to bind it a bit more). Spread the mixture out evenly onto parchment lined with plastic wrap (I've found that the plastic wrap helps with rolling it up, but it's not necessary). Layer the Prosciutto and Provolone on one side. Roll up the loaf and tuck under ends to fit into loaf pan. Cover the top of meatloaf with Ketchup if you desire. Place onto cookie sheet to catch drippings. Bake for 1 hr 15 min.

Drunken Hens


I've been really wanting to try beer chicken. So last week, I bought a chicken and put in in the fridge to thaw on Sunday thinking it would be safe there. When I woke up, my sweet sweet fiancee had started to roast my beloved chicken so that I would have something to take with me to work. Such a sweet gesture, but needless to say, I was disappointed because I had big plans for that chicken. So fast forward to this week. I had another idea to do drunken hens instead. And they turned out WONDERFUL! I of course did my own take on them and I will definitely be doing this again real soon. I never use recipes and generally just go off of the flavors that my family like most, but I am now attempting to start writing recipes so, bear with me and if you have questions, feel free to ask.

Marinade
*I add onion powder, garlic powder, pepper and some sort of season all to just about any meat that I cook. This is a personal preference and can always be omitted*
1 package McCormick's Italian Herb Marinade
1t McCormick's Grill Mates Sweet and Spicy Rub
1/4 cup Olive Oil
2 T Apple Cider Vinegar (or vinegar of your choice. Balsamic would be wonderful, but this is what I had in my cabinate. The marinade package actually calls for white vinegar)
Poultry Seasoning, Garlic Powder, Onion Powder, Pepper (about 1/4t of each, but add more or less to your taste)
1 cup Water (Start here and add more to your taste. The trick is to cut the marinade so its not too salty)

Mix all ingredients in a bowl. Pierce outside of hen with a fork to ensure great marinade penetration into meat. Place one hen and 1/2 of marinade into ziploc bag and shake to ensure even coverage. Be sure to get the marinade into the cavity. Repeat with the remaining hens. This marinade can be used for up to four. Refridgerate for at least 4 hours to overnight shaking and rotating the chicken in the marinade every so often.

The Cans
*In doing reasearch, I found that tomato paste cans are the perfect size to fit into the cavity of the hens. So buy two and remove the paste and freeze for later. I did not wash out my cans, because I actually wanted a little of that tomato flavor.

2 cans tomato paste emptied
2 cloves garlic
1/2 lemon cut in half
Chopped onion, celery, and garlic (about 1/4 cup)
White wine
Poultry seasoning and sage

Place 1/2 of the veggies, topped by one garlic clove, and 1 wedge of lemon(juice squeezed into can). This should come about halfway to top of can. Pour in wine to just cover contents and sprinkle the top with poultry seasoning and sage.

Ready to Rumble

Preheat Oven to 375. Youll need a large deep pan (roasting, casserole, etc.). Place your cand oin the dish. Carefully sit each hen down onto cup ensuring it is secure and won't tip. Your hen should be sitting upright but not completely on the dish.


Bake for 1 hr 15min basting every 15 minutes. Remove and let cool. Remove from cand prior to serving. Enjoy!


I served mine with Homemade cornbread dressing, Baked sweet potatoes with Cinnamon sugar butter, and collard greens. Yummy!

Tuesday, September 9, 2008

Inspired

Well the knitting bug has finally hit me. I have decided to participate in this years Red Scarf Project. It's such a great organization. I've already decided on this pattern and am checking my stash for a good quality yarn. I fear that the only thing i have in red is some leftover acrylic. This gives me an excuse to visit Needles and Knobs for some new yarn. I'm thinking Malabrigo. Yummy!

Monday, September 8, 2008

Separation Anxiety

I have been so caught up with Ivy, that the time has just flown by. I went back to work last Friday and let me tell you. I had terrible separation anxiety. Even though she was with my mother and I knew she was fine, I couldn't help missing her. Come Saturday morning she was wide awake and I managed to only sneak in about 2 1/2 hours of sleep. I damn near had a nervous breakdown from exhaustion by that evening, but it is all worth it. Just look at her.

So cute

I'm biased but isn't she just the cutest? Every day I am amazed by how much she has changed in a few short weeks. She is more vibrant and animated. Her personality is beginning to show and thankfully, so far she isn't high maintenance. I have to refrain from giving her loving "mommy" kisses and watching her smile with contentment all day long. Oh the joys of motherhood. Not much is better than this. One more pic for the road.

Too cute

As far as knitting goes, I still have yet to pick the needles back up, but am getting my projects together for many upcoming Birthdays and the holidays are right around the corner. Wow, I'm getting a slight headache just thinking about it. My mom's birthday is in a few weeks and I think I'm going to do some jewelry for her. Maybe I'll have time to whip up a shawl or something but that would require me to start today and I don't foresee that happening. I could possibly finish a Simple Yet Effective Shawl from Cosmicpluto by the 25th. I'm working on taking new pictures and updating my Ravelry page. I'll get it all together in due time.